Payment gateway integration is always a challenge for a developer. Mostly the App developers making apps on Niotron, Kodular, or any other AI2 builders. There are a few extensions available and also some server-based integration too. But today we’ll learn how to set up Paypal Payment gateway integration by using payment links API and builder default components of Niotron builder.
Please note that we are going to perform the testing in Sandbox mode. Also, I’m assuming that you already have a sandbox account for testing.
Get PayPal Credentials
Visit the Paypal developer dashboard and log in/register to your account. Hereunder REST API apps Create a new app or you can use the older one too. Now choose the app and get the Client ID and Secret. Use the Authorization tool to get the Basic Authorization token.
Basic QWZRbjhrd213My1kMEpaCTlVbWoySVloaFdBRGxQMWQ1bWxrbHJZcDhHdEVRek8yVW93MF83UnVkRzhCc3ZvZ3VxeWpjQnlLdjMOM3JQeG86RU9BVE4zNXN5TkxCVlRWaDk3X1pWOWRiWDYyVGlncWxEa1N2U0Zvd3ZKSWpxb1ljTGU0bF10MZnlKOLlLbnNubDB1eHllMGE2cGXXXXpKTDM=

Encoded Base64 – Basic <ClientID:Secrect>
Designer Part
Here we are going to take 3 Web components. 1st to generate an access token. 2nd generate payment links & 3rd to process the payment and verify it.
Also, a web viewer is used to load the payment page so user can access their PayPal account and approve the payment. And a button to initiate the payment process.
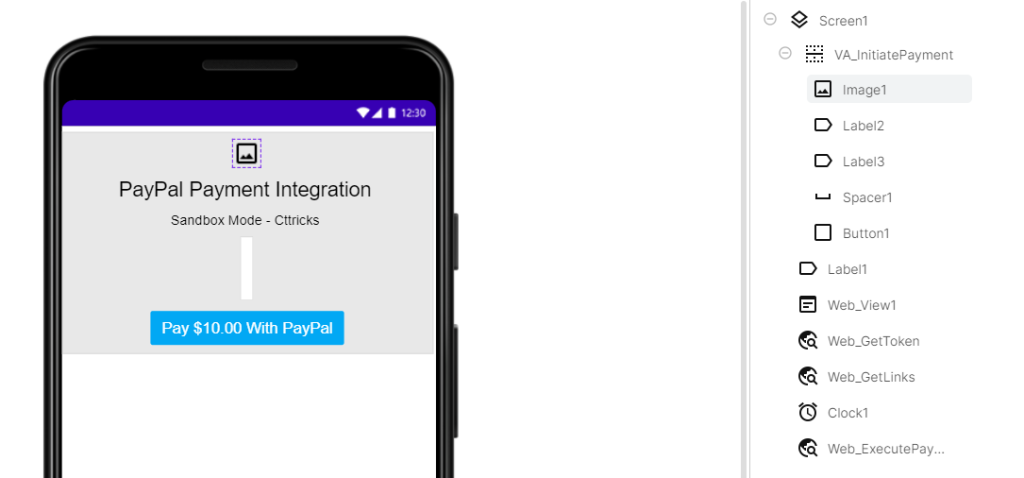
Please note that ‘Label1’ is used to print the status of the process going on in the blocks section. we can hide this later in production/live more.
Blocks Part
First, we need to create a global variable ‘api_url‘ and set the value to https://api-m.sandbox.paypal.com
Generating access token
On button click, We have to make an API request to /v1/oauth2/token to generate an access token.

Post Request Body
{"intent": "sale","payer": {"payment_method": "paypal"},"transactions": [{"amount": {"total": "30.00","currency": "USD","details": {}},"invoice_number": "invoice_48787589672","payment_options": {"allowed_payment_method": "INSTANT_FUNDING_SOURCE"},"item_list": {}}],"redirect_urls": {"return_url": "https://redirect-example.com","cancel_url": "https://cancelled-example.com"}}Get Link & Process Payment
In response, we’ll get a Link array containing three links but we only need two of them to authorize and process the payment. Also, we need to create another global variable to store execute_url. It is required to get the payment once the user authorizes it.
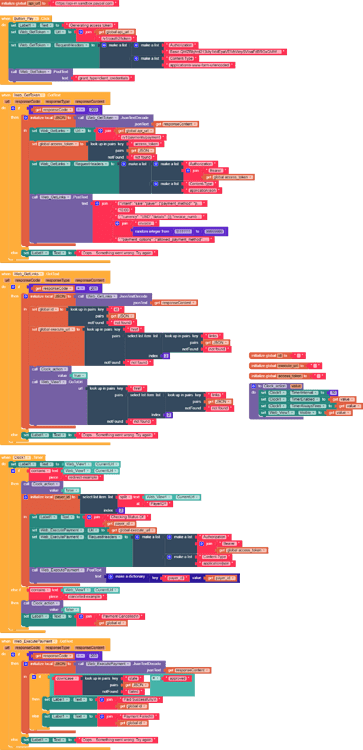
Here we also need the CLOCK component to keep checking if the web viewer URL is changed to redirect or cancel the URL.
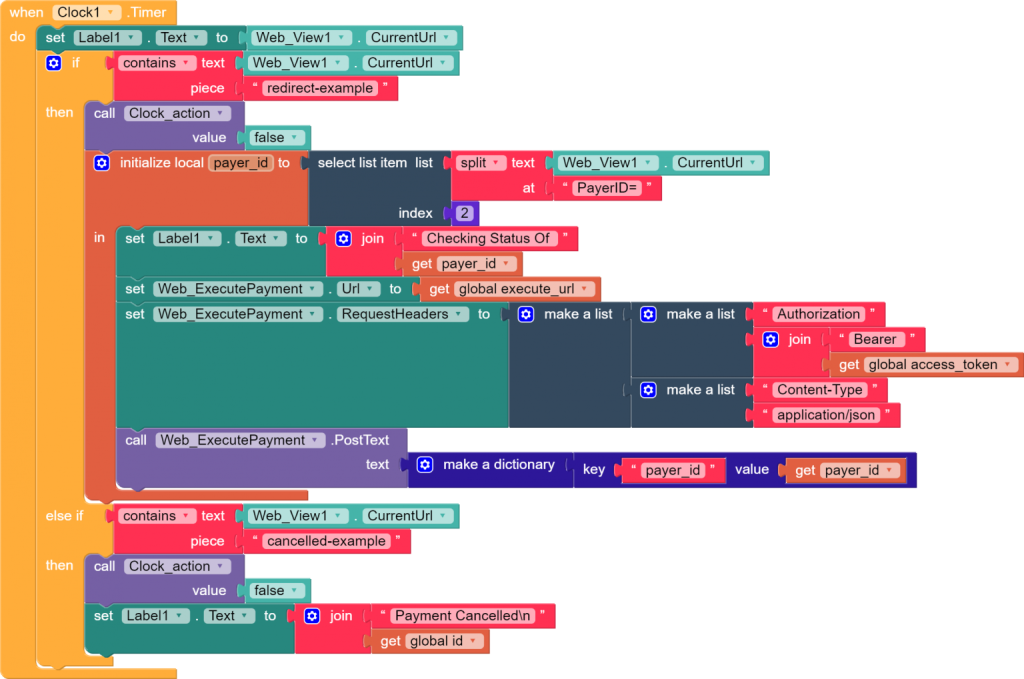

Once the user completes/cancels the payment. Paypal will redirect them to our redirect URL along with PayerID. Now we have to make the 3rd API request to verify and complete the payment.
Please note that if we skip this step the amount will not get deducted from the buyers/users account and the payment will not get completed.
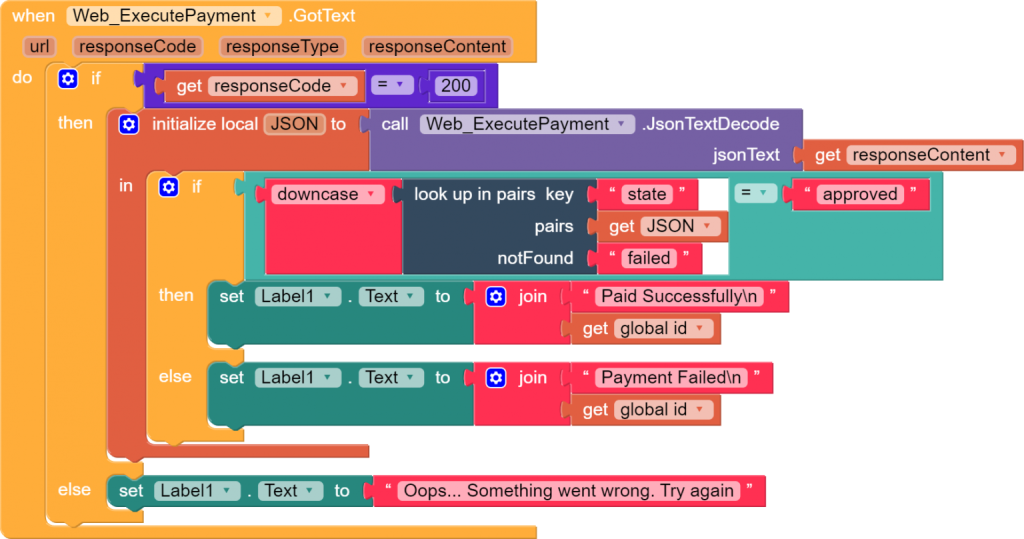
Congratulations! we have successfully integrated the PayPal payment gateway into our app.
I am providing the demo AIA file so you can have a look and give it a try. If you have any queries or suggestions feel free to write them in the comments below.
Important links
- Download Demo AIA
- Visit Niotron Community Post
- Video tutorial (Coming Soon)